(Use this article when you want to understand what the Follow-Up Module is and how it works as a whole.)
🔍 Overview
The Follow-Up Module in DaaI Business Suite is a central place where sales teams can view and manage all due follow-ups — whether they come from Prospects or Opportunities. It helps teams stay organised, avoid missed follow-ups, and move deals smoothly through the sales pipeline.
- Centralized Data: Keep all follow-up information in one place for easy access.
- Enhanced Sales Pipeline Management: Quickly track the status and history of opportunities.
- Improved Customer Engagement: Timely follow-ups lead to higher conversion rates and stronger customer relationships.
- Actionable Insights: The dashboard provides a visual representation of your sales activities, helping you identify areas that need attention.
- Multiple Views: Supports Grid View, Kanban View, and (if enabled in your build) a Calendar View for flexible tracking.
- With this module, you can ensure a systematic approach to managing leads and opportunities, improve follow-up accuracy, and stay organized in your sales efforts.
🎯 Purpose of the Follow-Up Module
- Keep all follow-up information centralised.
- Improve client engagement with timely communication.
- Track sales progress from Prospect → Opportunity → Negotiation.
- Maintain detailed call/meeting notes & history.
- Prioritise work using status tags (HOT / WARM / COLD) and per-card urgency tags.
- Increase conversion rate through disciplined follow-ups.
👁️ Views in the Follow-Up Module
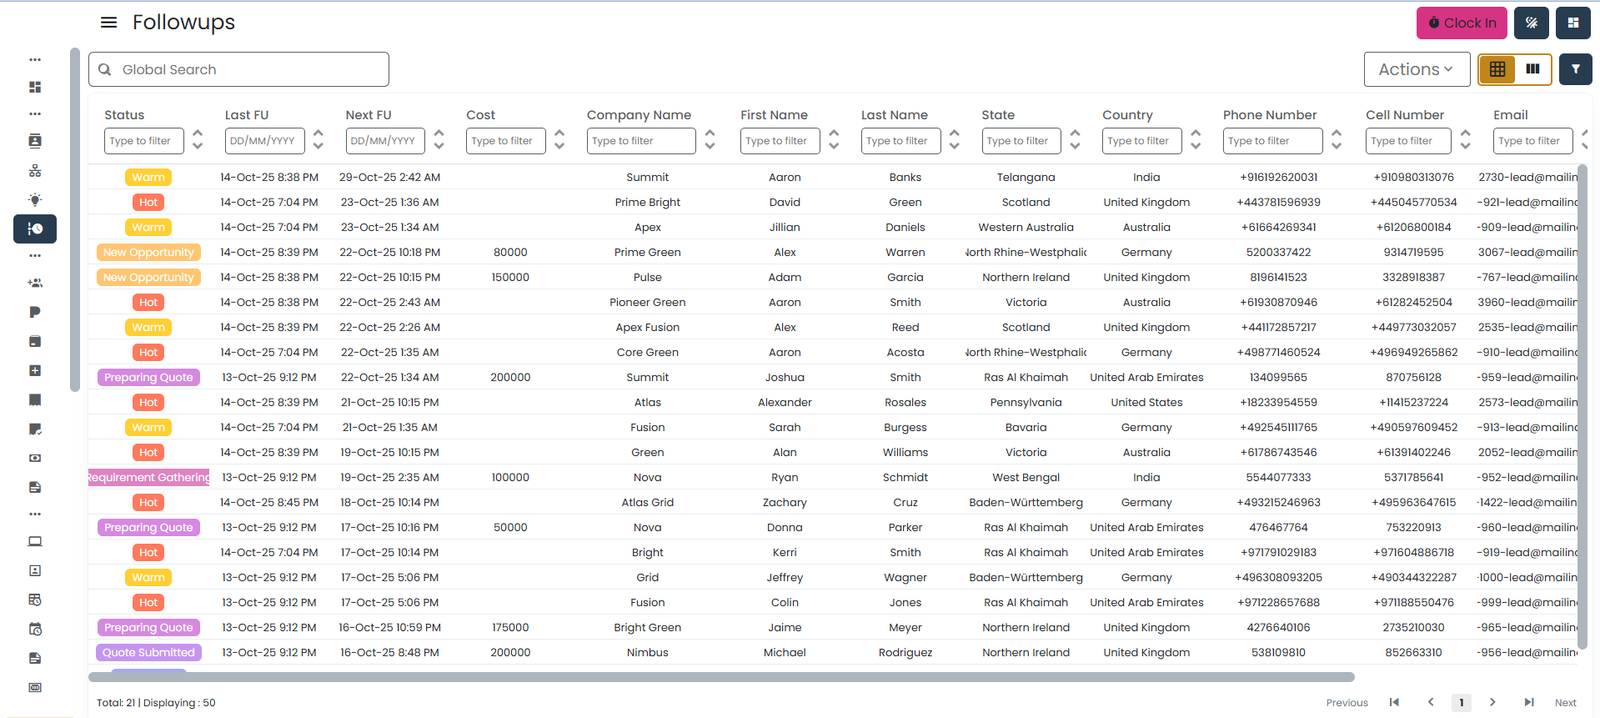
1️⃣ Grid / List View
A simple table view (like a spreadsheet) where you can sort, filter, and search any follow-up record.
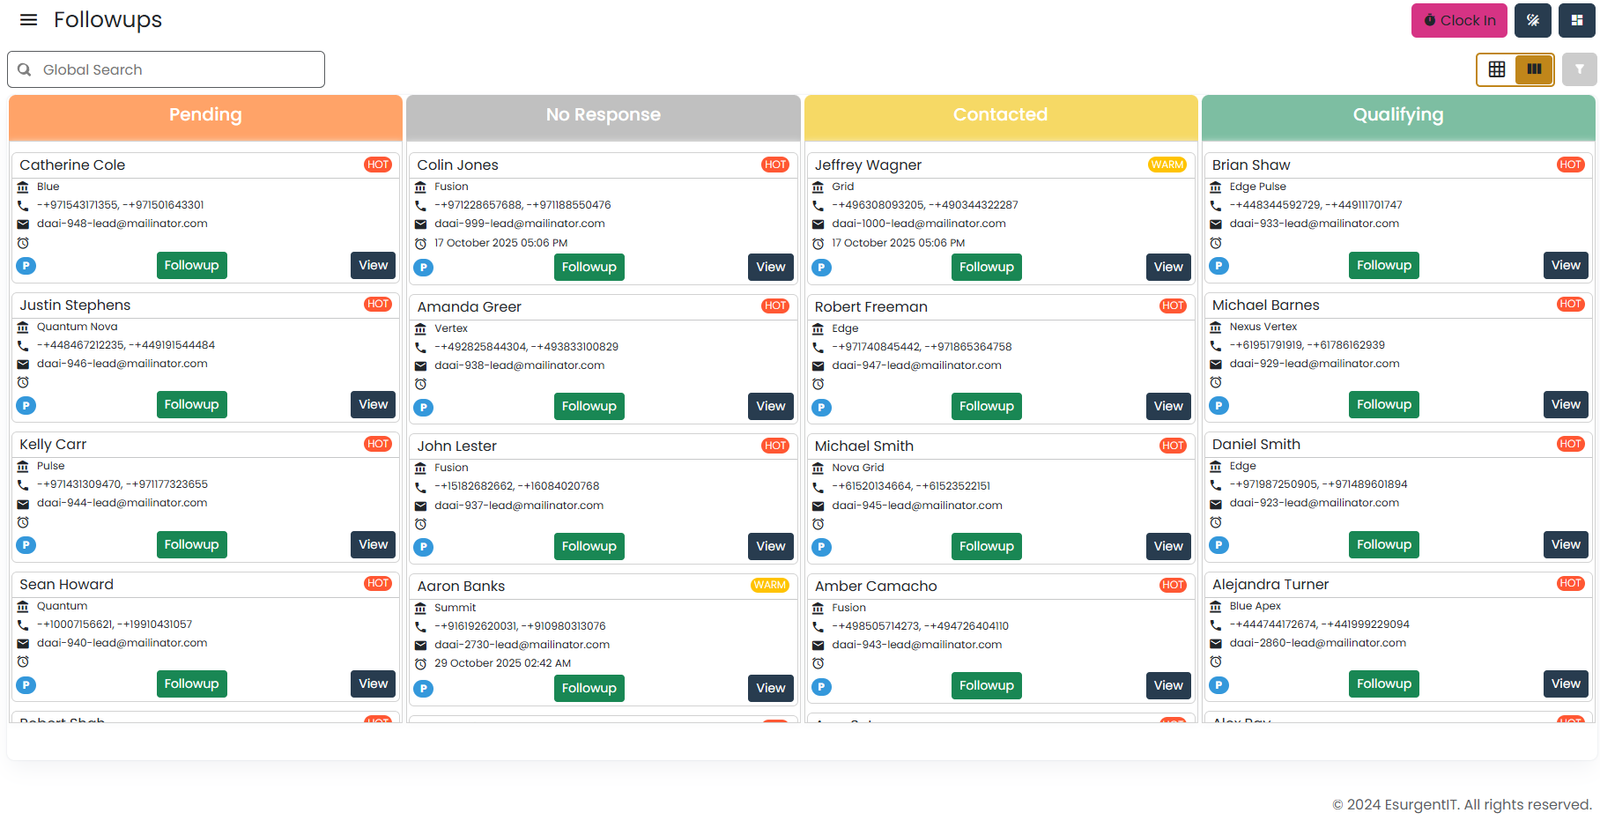
2️⃣ Kanban View
A graphical dashboard with drag-and-drop ability to change follow-up status.
How to Switch Between Kanban View and Grid View
You can easily switch the Follow-Up module between Grid View and Kanban View using the toggle buttons at the top-right corner of the screen.

- Go to CRM → Followups.
- On the top-right of the page, you will see view-toggle icons:
- Grid/Table View Icon – shows follow-ups in table format.
- Kanban View Icon – shows follow-ups as drag-and-drop cards.
- To enable Kanban View:
- Click the Kanban View icon (the icon with three vertical columns).
- If you are currently in Grid View, the screen switches to Kanban View instantly.
- To switch back to Grid View:
- Click the Grid/Table View icon (the square grid icon).
- The view changes back to the table format.
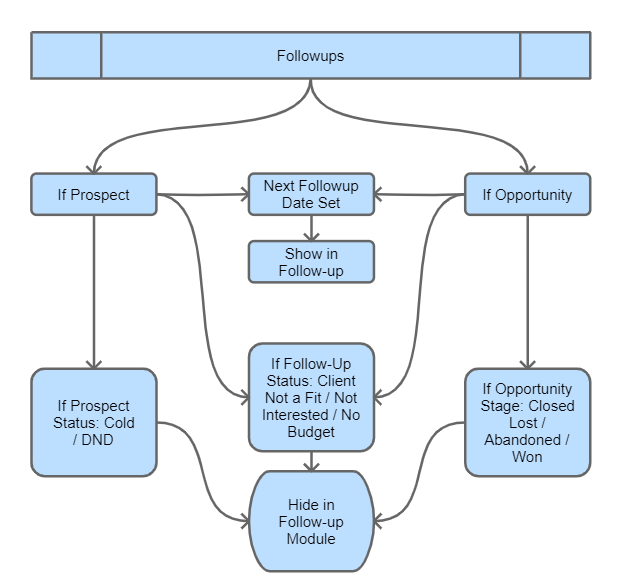
🧠 When does a Lead/Prospect/Opportunity appear in the Follow-Up list?
Prospects and Opportunities are removed from the Follow-Up Module when their state indicates they’re no longer worth pursuing. This ensures only active & relevant follow-ups are shown.
- Follow-Up Status:
- Client Not a Fit
- No Budget
- Not Interested
- Prospect Type:
- Cold
- DND
- Opportunity Stage:
- Closed Lost
- Abandoned
- Won
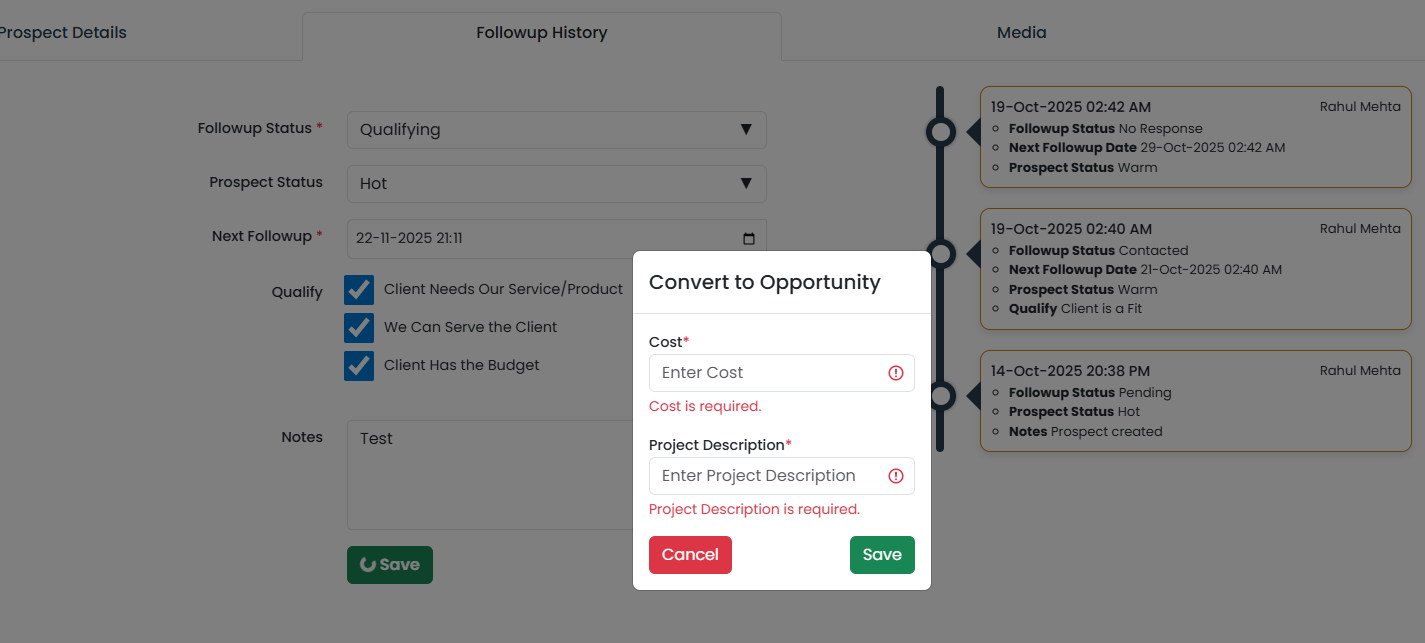
🔁 Conversion of Prospect → Opportunity
- Open any follow-up that belongs to a Prospect. The system only auto-converts if all 3 qualification checkboxes are ticked:
- Client Needs Our Service / Product
- We Can Serve the Client
- Client Has the Budget
- When these conditions are met and you click Save, a popup appears with the following fields:
- Estimated Cost: Enter the estimated project cost.
- Project Description: Enter the project name or a short description.
- After Confirmation:
- ✔ Prospect is converted.
- ✔ Moved automatically to the Opportunity Module.
- ✔ Removed from the Prospect list.
💡 Tips for Using the Follow-Up Module
- Always update Follow-Up Status after every interaction.
- Add full notes for accurate history.
- Set the Next Follow-Up Date properly — empty dates can drop the row from the queue.
- Prospects convert automatically only when fully qualified.
- Use Kanban for daily work; use Grid for detailed review. To learn how to use the Kanban view, see Prospect Kanban view article.
- Easily update follow-up status as the deal progresses.
- Visual tracking of client interactions at different stages.
- Streamlined workflow for better sales and CRM management.