(Use this article when you want to search, filter, sort, or update many follow-ups in table form.)
Grid View shows all follow-ups in a table format. It is ideal for users who prefer a structured, data-focused layout.
📍 When to Use Grid View
- Handle large numbers of follow-ups.
- Apply filters (by name, date, status, etc.).
- Do quick inline edits.
- View full details in a single row.
- Update multiple records efficiently using bulk actions (multi-select then assign / change status).
📊 Columns in Grid View
- Status Tag (from Prospect Type or Opportunity Stage)
- Client Name
- Company Name
- Phone
- Follow-Up Date
- Follow-Up Time
- Follow-Up Status
- Prospect / Opportunity Status
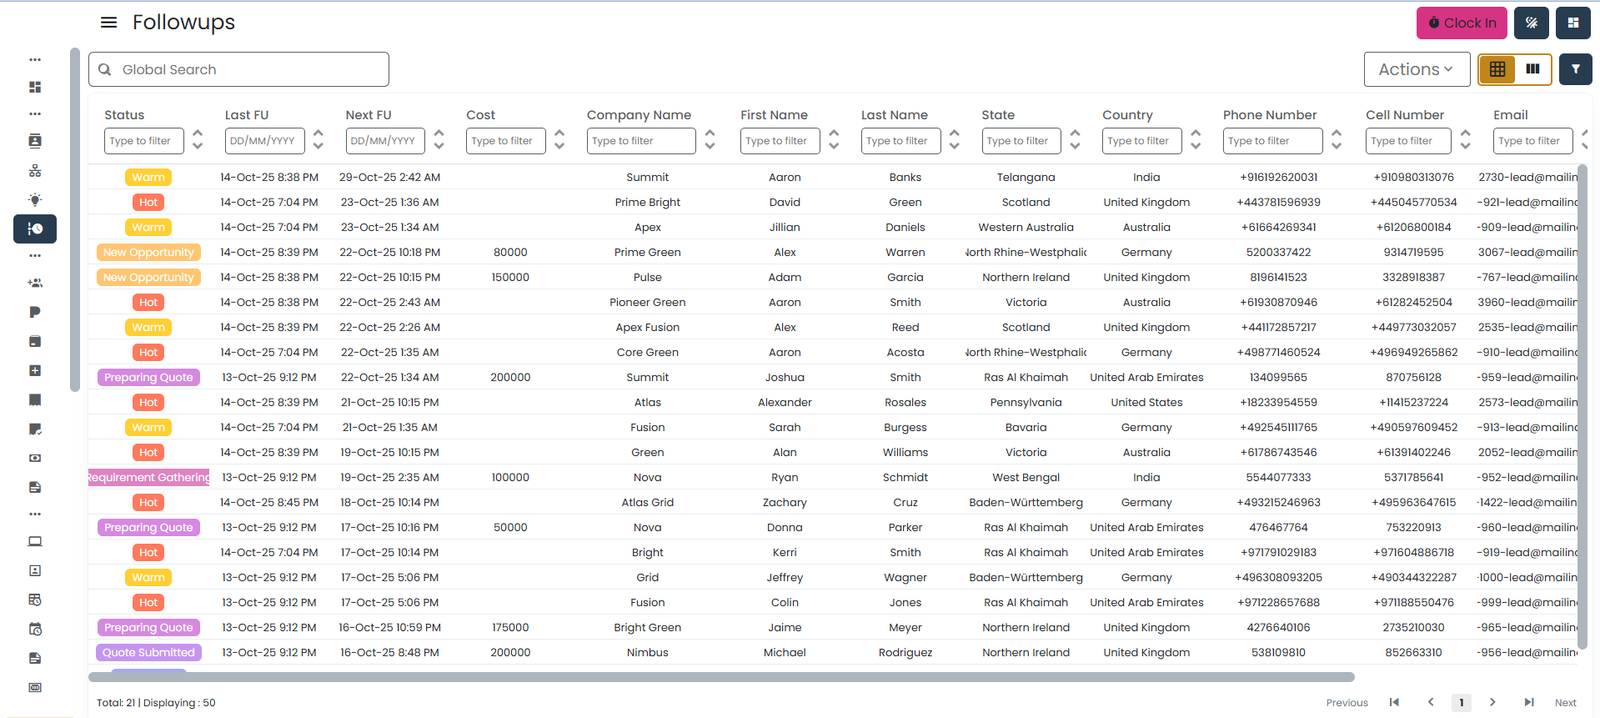
🔧 Features in Grid View
- Sorting: Click column headers to sort:
- Oldest → Newest
- A → Z
- Hot → Cold
- Filtering:
- Follow-Up Status
- Prospect / Opportunity
- Date range (with quick presets: Today, This Week, This Month, or Custom range)
- Name
- Assigned User
- Bulk actions: Tick the checkbox on multiple rows, then use the Action menu to reassign owner or change status across all selected rows at once.
➕ Add Follow-Up
Follow these steps to add a new follow-up entry for any Prospect or Opportunity. You don’t add a follow-up directly from the Grid — click into the parent record and add it from the Follow-Up History tab. Each save creates a new history entry; existing entries stay in the timeline as an audit trail.
- Open the Lead
- Click on any row in the Grid View.
- This will open the detailed view of the selected lead/prospect/opportunity.
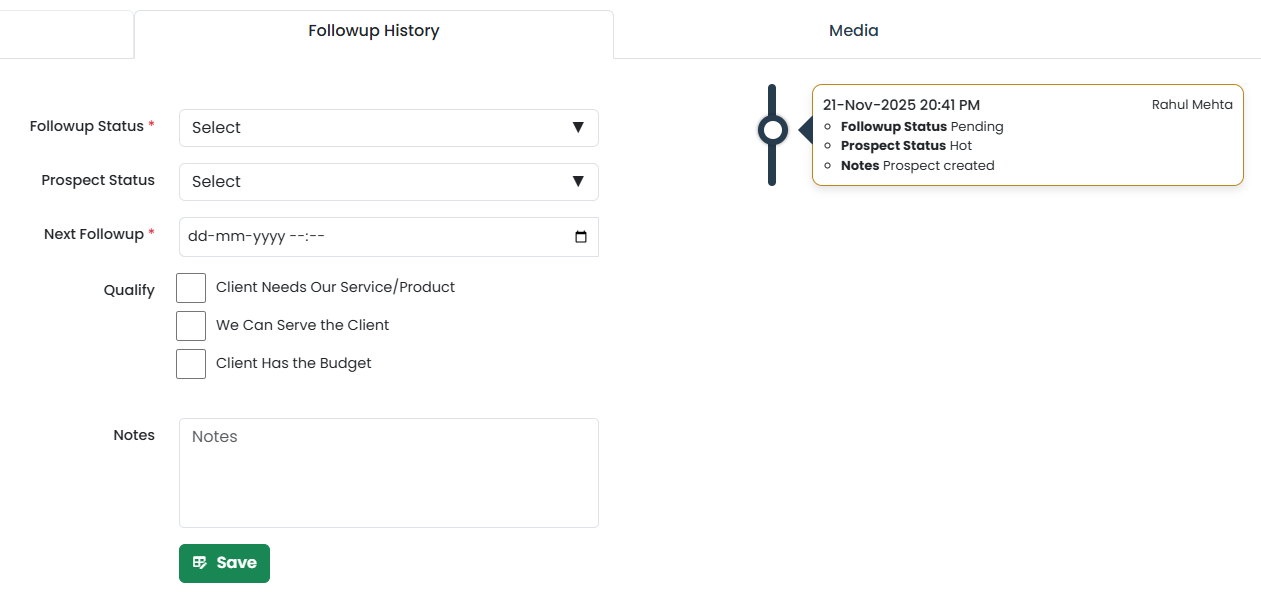
- Open Follow-Up History
- Click on the Follow-Up History tab.
- This tab displays the full Follow-Up Form alongside the timeline of past entries.
- Fill the Follow-Up Form. Enter the following details (if applicable):
- Follow-Up Status
- Prospect Type (Prospect only)
- Next Follow-Up Date
- Qualify Lead Options (Prospect only):
- Client Needs Our Service/Product
- We Can Serve the Client
- Client Has the Budget
- Notes (text description of the call/meeting)
- Click Save to record the follow-up.
- The details you entered are stored in the lead’s Follow-Up History as a timeline entry.
- If the prospect is fully qualified, it gets converted to an Opportunity (see Convert Prospect → Opportunity).
💡 Tips for Grid View
- Use filters to narrow down your daily list.
- Always set the next follow-up date.
- Grid is best for handling bulk follow-ups.
- Use View to see the full history before calling a client.
- Once a follow-up entry is saved it becomes a permanent timeline row — to correct it, add a new entry rather than editing the old one.